A bright, white smile can significantly boost your confidence and change how you interact with the world. While stores offer countless strips, gels, and toothpastes, nothing compares to the power and safety of a professional teeth whitening treatment. If you’re considering brightening your smile but feel a little nervous about the process, you’re not alone. Understanding what happens during the appointment can ease any anxiety. This guide will walk you through every step of a typical in-office teeth whitening session, from consultation to your stunning new smile.
The Initial Consultation: Your First Step
Before any whitening gel is applied, your journey starts with a consultation. This is a crucial first step where your dentist at Riverside Dental will conduct a thorough examination. They will check for any underlying issues like cavities, gum disease, or cracked teeth, as these problems usually need to be addressed before whitening. This is also your time to discuss your goals. We’ll talk about your desired shade, discuss your lifestyle habits, and determine if professional teeth whitening is the best option for you.
Step 1: Getting Your Teeth Ready
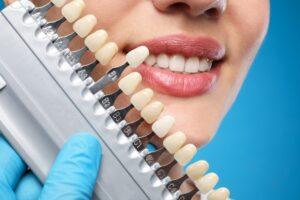
Once you’re cleared for the procedure and settle into the dental chair, the preparation begins. A dental professional will likely start by recording the current shade of your teeth using a shade guide. This is a great, objective way to see a clear “before and after” comparison. Then, your teeth will be given a quick polish. This isn’t a deep cleaning, but it effectively removes any surface plaque, film, or debris to ensure the whitening gel makes even contact with your tooth enamel.
Step 2: Protecting Your Gums and Lips
One of the biggest differences between professional and at-home whitening is safety. The whitening agents used in a dental office are powerful, so protecting your soft tissues is essential. Your dentist will carefully place a plastic or rubber cheek retractor to gently hold your lips and cheeks away from your teeth. Then, a liquid protective barrier is “painted” onto your gums, right where they meet your teeth. This barrier hardens under a special light, creating a secure seal that prevents the whitening gel from touching and irritating your sensitive gum line.
Step 3: Applying the Whitening Gel
With your gums and lips safely protected, it’s time for the main event. Your dental professional will meticulously apply the professional-grade teeth whitening gel directly to the front surfaces of your teeth. This gel typically contains a high concentration of hydrogen peroxide or carbamide peroxide. This active ingredient is what breaks down the chromogens—the molecules responsible for stains—within your enamel. The gel is applied carefully to ensure every visible tooth is evenly coated for a uniform, brilliant result.
Step 4: Activating the Process
Many modern in-office teeth whitening systems use a special light (often a blue LED or laser) to accelerate the whitening process. Once the gel is applied, this light will be positioned directly in front of your teeth. The light energy activates the peroxide, helping it penetrate the enamel and break down deep-set stains more quickly and effectively. This part of the process is often broken into two, three, or even four 15- to 20-minute intervals, with fresh gel potentially being applied between each one.
Step 5: The Big Reveal and Aftercare
After the final interval, the work is done. You can just relax while the dental team suctions away the whitening gel and removes the hardened gum barrier and cheek retractors. You’ll rinse your mouth, and then comes the exciting part: seeing your new smile! Your dentist will bring out the shade guide again to compare your “after” shade with your “before” shade. Most patients see a dramatic improvement of several shades in just one visit. Your dentist will then give you specific aftercare instructions, which are crucial for maintaining your results.
What About Tooth Sensitivity?
This is the most common question patients have. It is possible to experience some temporary tooth sensitivity during or after the teeth whitening procedure. This happens because the peroxide temporarily opens the pores (dentinal tubules) in your teeth, allowing the nerve to be more exposed. This sensitivity is almost always short-lived, typically fading within 24-48 hours. Many professional systems also include desensitizing agents in their gels or as a post-treatment application to minimize any discomfort.
Why Choose Professional Whitening?
With so many over-the-counter options, you might wonder if an in-office treatment is worth it. The answer lies in three key areas: safety, speed, and supervision. A dentist ensures your gums are protected from the strong gel, preventing chemical burns. The results are immediate and far more dramatic than anything you can achieve at home, often lightening teeth up to eight shades in one visit. Plus, if you have sensitive teeth, old fillings, or crowns, your dentist can customize the treatment and manage your expectations, something a one-size-fits-all strip can’t do.
Ready for Your Professional Teeth Whitening?
A professional teeth whitening appointment is a simple, safe, and highly effective way to achieve the brilliant smile you’ve always wanted. In about an hour, you can safely reverse years of staining from coffee, tea, red wine, and other foods. If you’re ready to stop hiding your smile and want to learn more about how we can help you achieve your smile goals, the team at Riverside Dental is here to answer your questions. Contact us today to schedule your consultation!